


Gmail Config (POP)
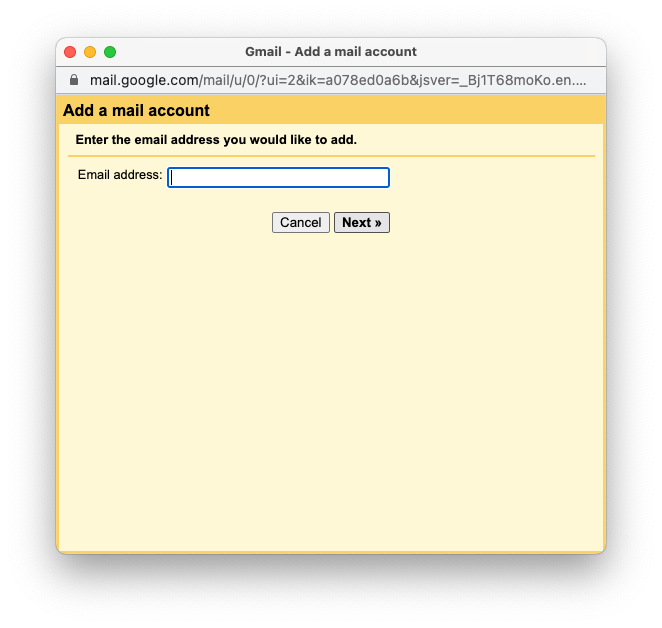
Step 1 – Set Email Address
- Add – Email address
- Hit – [next]
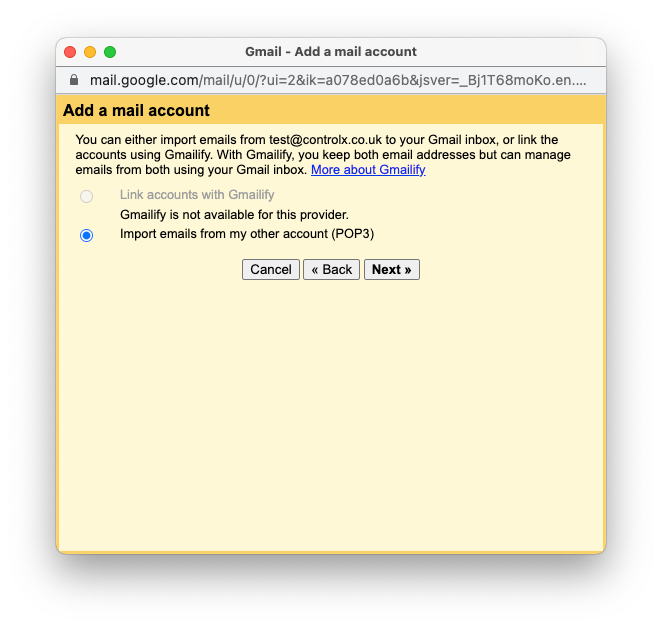
Step 2 – Import Method
- Select – Import emails from my other account (POP3)
- Hit – [next]
Step 3 – Mail Settings
Settings will be as provided.
- Add – Username: your email address
- Add – Password: as supplied
- Add – POP Server: as supplied i.e mail.domain.etc
- Add – Port: 995
- Check – Always use a secure connection (SSL)
- Check – Label incoming messages [select your preference]
- Hit – [Add Account]

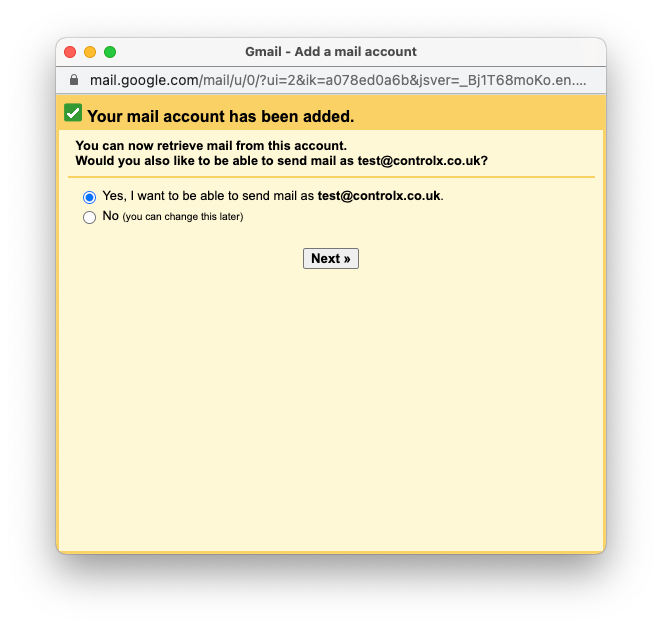
Step 4 – Send as
- Select – Yes, I want to be able to send mail as …
- Hit – [next]
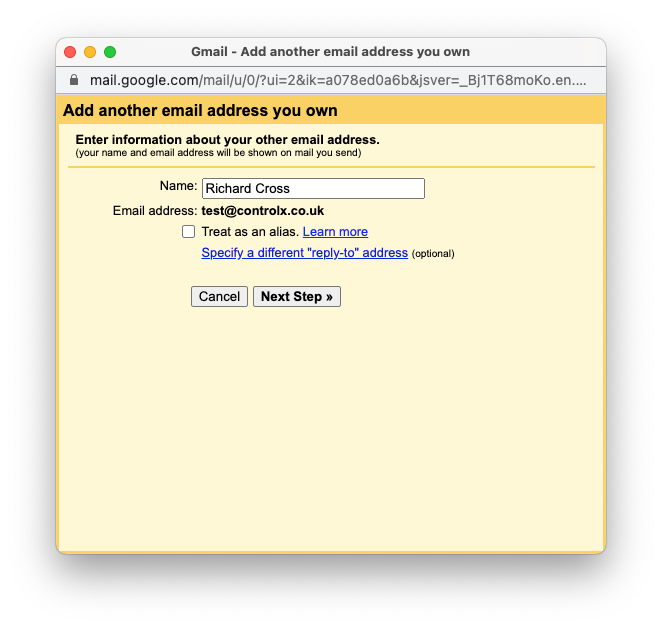
Step 5 – Alias
- Uncheck – Treat as an alias
- Hit – [next]
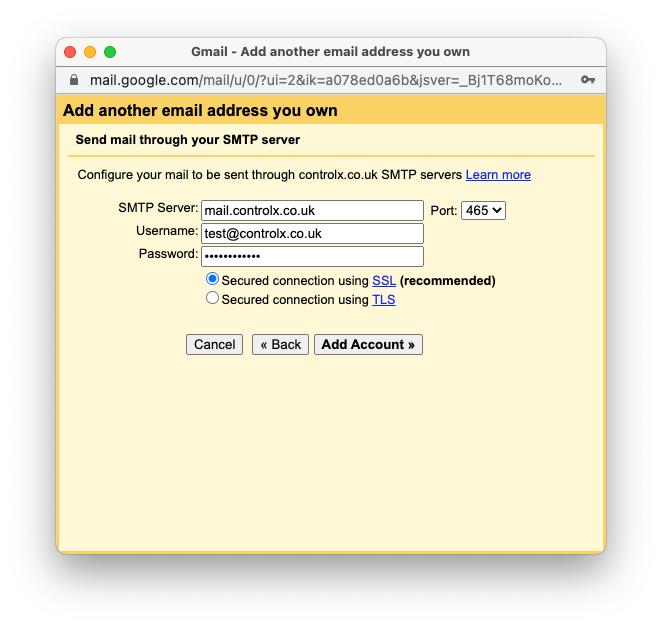
Step 6 – Send Settings
Settings will be as provided.
- Add – SMTP Server: as supplied i.e. mail.domain.etc
- Add – Username: your email address
- Add – Password: as supplied
- Add – Port: 465
- Select: Secure connection using SSL (recommended)
- Hit – [Add Account]
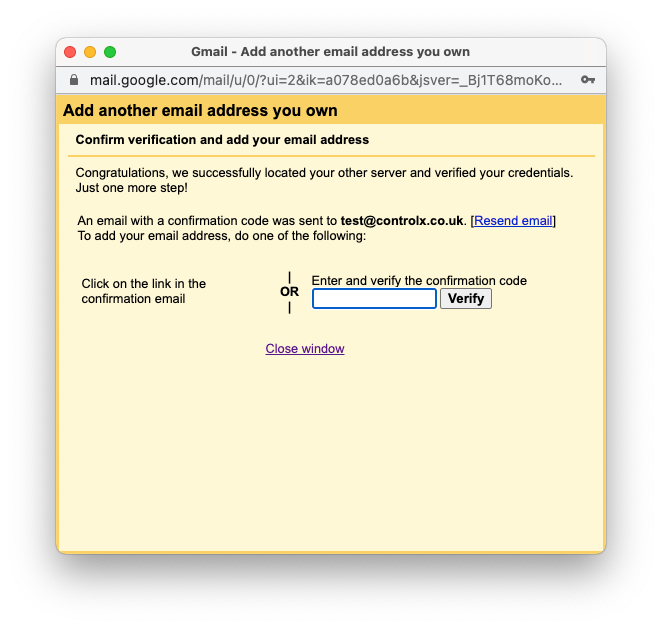
Step 7 – Verification
Gmail will send you a verification code, if you have problems finding this code please contact support.
- Enter and verify the confirmation code
- Hit – [Verify]
This last step should return you to Gmail where you will be able to send / receive mail using your email address.